RAID
RAID (Redundant Array of Independent Disks) is a clever technology that can be
used to increase hard drive performance, protect data, or depending on the
number of disks in the “array”, both. For network storage its recommended that
RAID is used to protect data, with the cheapest solution being RAID 1 type
storage.
RAID 1 requires a minimum of two similar hard drives, preferably identical that
are converted into a mirror, like it sounds all data on a drive has an exact
copy on the other, any changes made are made to both disks simultaneously. If
one drive fails, the other can keep the system running and files safe until the
failed drive is replaced at which point the replacement drive is “re populated”
and a mirror of the surviving drive can be made.
RAID can be achieved in two ways, software raid is low cost option that is
managed by either the operating system or sometimes built into the motherboard. Secondly is hardware RAID where it is handled by a dedicated
RAID card or built in to the motherboard, this is more expensive but has speed
advantages if it's intended to be used on a workstation and adds an extra layer
of integrity as the work is done at hardware level before even the operating
system knows about it.
Setup Guide
To keep costs at a minimum and for more compatibility this guide will show how
to create a software RAID 1 using Disk Management, available on all modern
incarnations of Windows.
Open Disk Management by pressing  and
R key, in the Run window type diskmgmt.msc .
and
R key, in the Run window type diskmgmt.msc .
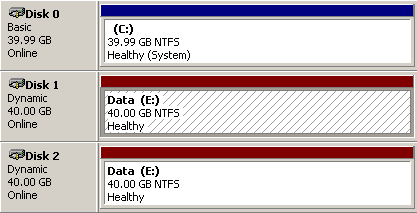
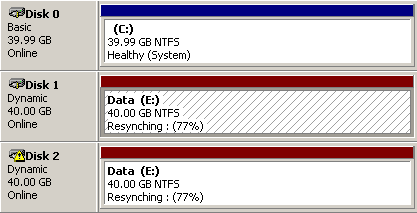
Here Disk 0 is the system drive storing the operating system,
Disk 1 contains
important data that will be converted to RAID, and Disk 2 is a new blank hard
disk.
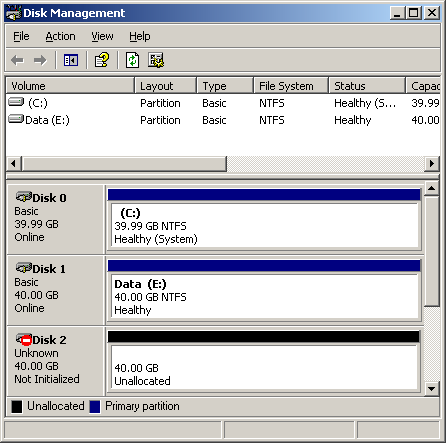
Right click Disk 2 (where its says Disk 2 on the left hand side of the window)
and click Initilize disk, the pop up window will ask you to choose again, click
OK. The disk will then be online.
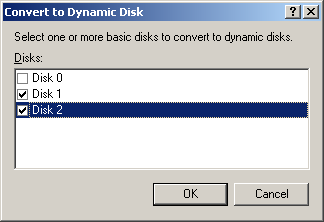
Right click Disk 2 again and click Convert to Dynamic disk, at the next pop up
window check the box of Disk 1 and Disk 2, as they both need to be dymanic
disks
before mirroring.
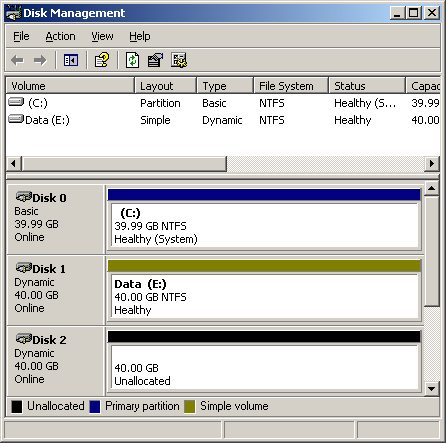
Read the following notifications and if happy proceed
with converting. When converted they will be labelled as Dynamic.
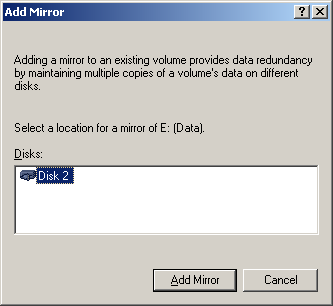
To begin mirroring, right click the partition (right hand side) of Disk 1 and
click Add mirror. The popup will display suitable drives, choose Disk 2 and
click Add mirror.
Disk Management will now start syncing the drives, the time to
complete syncing depends on
the size and amount of data on the first drive and could take many hours.
During
this time its best not to intensivly use this drive to speed up resyncing and
the system needs to remain powered on, but it is fine to close the Disk
Management window and log off the machine.
When done, the system will report as healthy and the drive has redundancy.