Setup Guide
When setting up a VPN it is best to start by using the PTPP protocol as it is
the most supported and therefore less change of compatibility issues, it
security and encyption is an absolute must then L2TP would be the better choice,
though not as popular PTPP is has been widely accepted.
The following guides will give steps to create a PPTP tunnel to the server
Windows Server
The Windows Server version of VPN hosting can be configured in many different
ways, in this example it will be set up on a machine that utilises one network
card for simplicity.
The VPN server should be already available on a default installation of Windows
Server, if it is not available then it can be installed via Add Remove Windows
Components section or Turn Windows Features On or Off.
In the Control Panel, choose Administrative Tools then open
Routing or Remote Access / Remote Access depending on the version of Windows.
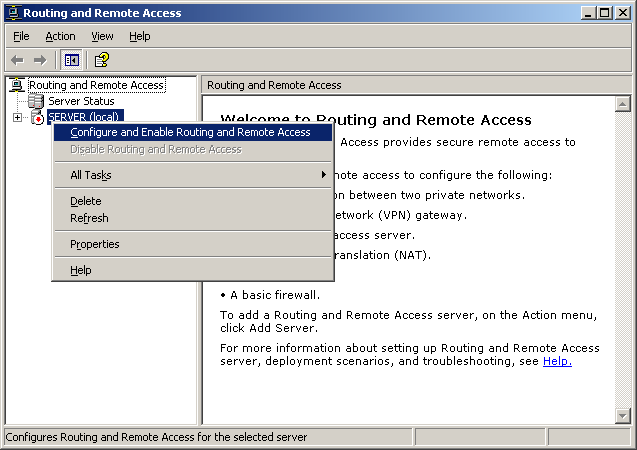
On the left pane of the management console, right click the
server name (local)
and choose Configure and Enable Routing or Remote Access.
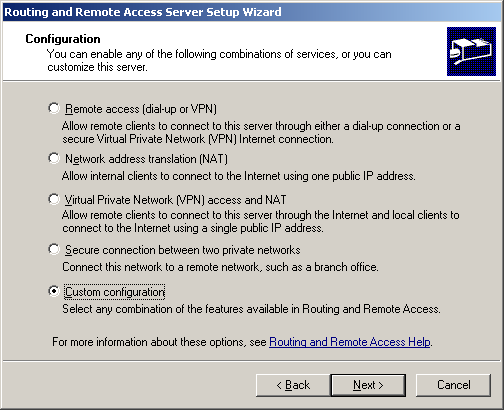
At the configuration scren of the wizard, choose Custom Configuration.
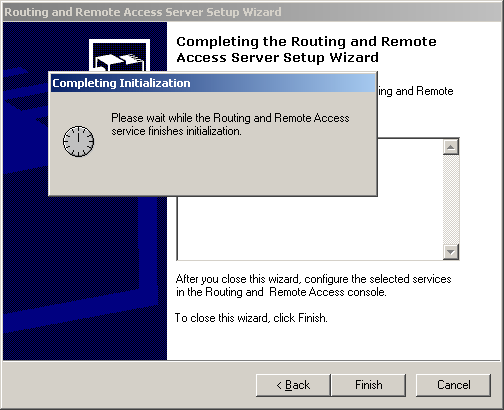
On the next screen Tick VPN Access, another click of next and the Summary screen
follows. Click Finish and the VPN service will start.
With the VPN server running, its time to configure it for incomming connections,
Right click the server name again and choose properties. Then choose the a
IP
tab.
Since the server is not running a DHCP server, or not connected to one due to
the static IP, an address pool needs to be created.
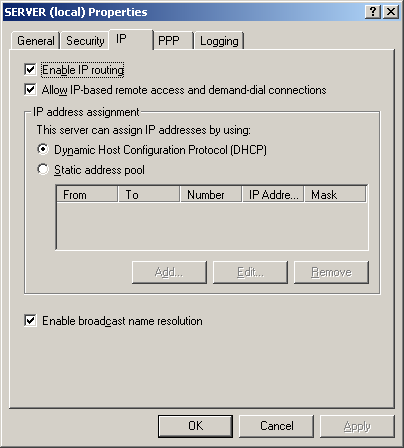
Move the radio button to Static IP Pool then click Add
In the New Address Range box, add a range of IPs like below, making sure that
they have the same prefixes as the local network, its best to use a range above
200 on the final prefix to avoid interference from any DHCP servers and other
devices.
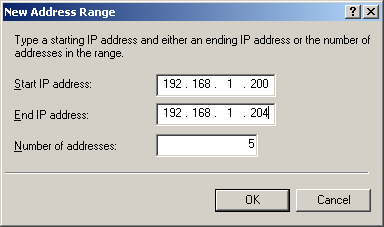
Click OK and an address pool has been added, click OK again to close the window
and complete the server setup.
Setup VPN Connection
From a remote PC wanting to connect via VPN, open the Network Connections Window
by pressing
 key and R, then typing
ncpa.cpl and OK, in the window double
click New Network Connection to start the wizard.
key and R, then typing
ncpa.cpl and OK, in the window double
click New Network Connection to start the wizard.
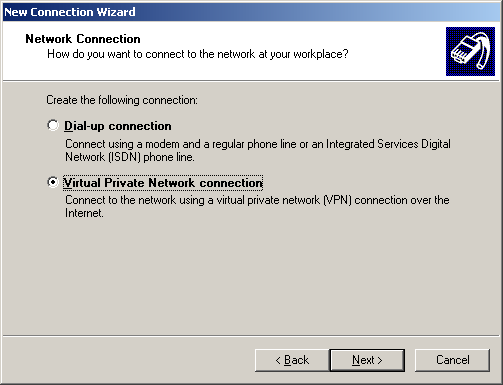
Click Next at the start screen, then choose Virtual Private Network connection
on the next screen, then Next
Under the Host name field, enter either the internet domain of the server if it
has one, or the DDNS address of the server, followed by Next.
A quick review and it's ready, the VPN connection will appear on the Windows
machine as if it was a dailup connection, allowing users to connect and
disconnect at will depending on requirements.

To connect, double click the VPN connection, enter a username and password that
resides on the server and is enabled for a Dail-in Connection, and click
Connect.